
Adjusting handlebars on a Harley Davidson with a Batwing Fairing can be a concern for some riders. Fortunately, there is a quick and easy way to adjust those handlebars without a lot of disassembly.
Tools Used
Craftsman Allen Wrench Socket Set
Craftsman Hex Bit Socket Set
Craftsman Torque Wrench
Handlebar Related Articles With Videos
Installing 12" Paul Yaffee Handlebars On A Harley Davidson (2012 Street Glide)
Installing 10" Paul Yaffee Handlebars On A Harley Davidson (2015 Street Glide Special)
Installing 12" Paul Yaffee Handlebars On A Harley Davidson (2022 Street Glide Special)
Prepping And Wiring Motorcycle Handlebars
Adjusting Handlebars On Harley Davidson Touring Models
Reasons To Replace Motorcycle Mirrors
Mirror Plugs On A Harley Davidson Touring Motorcycle
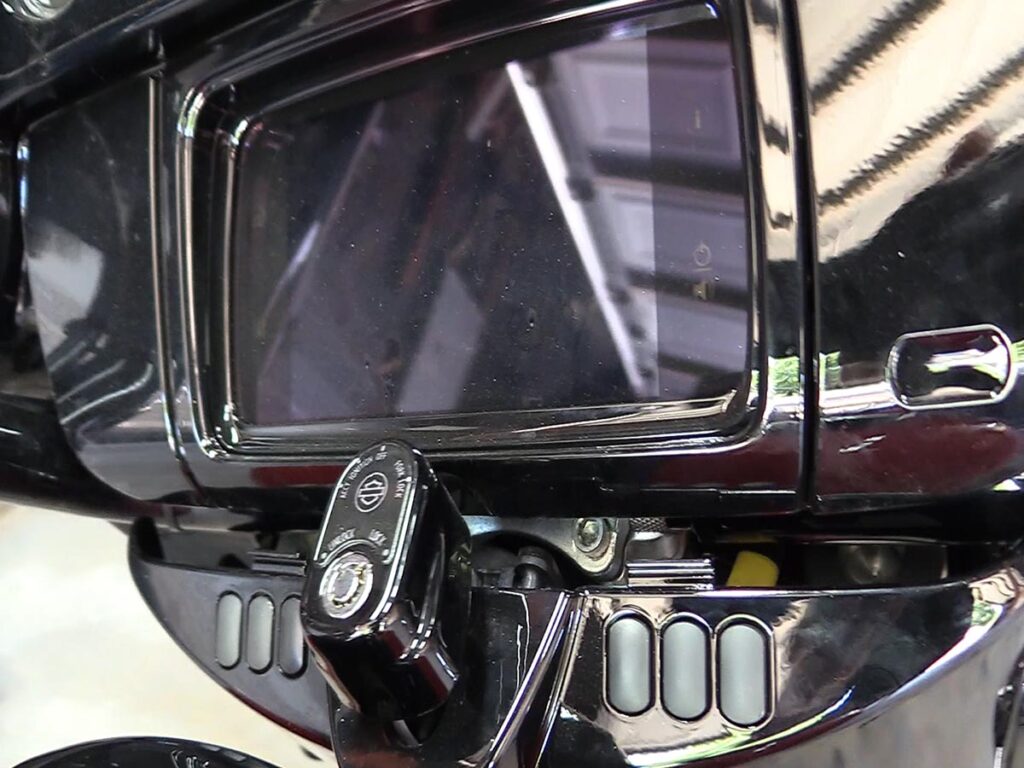
Remove Ignition Cover
Removing the ignition cover will give you access to two bolts on the handlebar clamp. You don't even have to completely remove the cover. Just remove the two screws that hold it in place and pull it back enough to reveal the handlebar clamp bolts.
2012 And Earlier Models Ignition Cover
2012 and earlier had a different ignition cover than later models. It did not have the notch around the ignition that allows you to slide the cover back to reveal the lower handlebar clamp bolts. You have to remove the ignition switch by pushing a button underneath which allows you to pull the switch out. Then you can remove the cover.
2012 And Below Models With Batwing Fairing
If you have a 2012 or below the touring model of Harley Davidson with a batwing fairing the task is more difficult because the handlebar clamp bolts are Torx. In this case, you might need to loosen the entire fairing and lift it so the Torx bit will fit into the bolt properly. You still only need to loosen the two handlebar clamp bolts closest to the tank side.
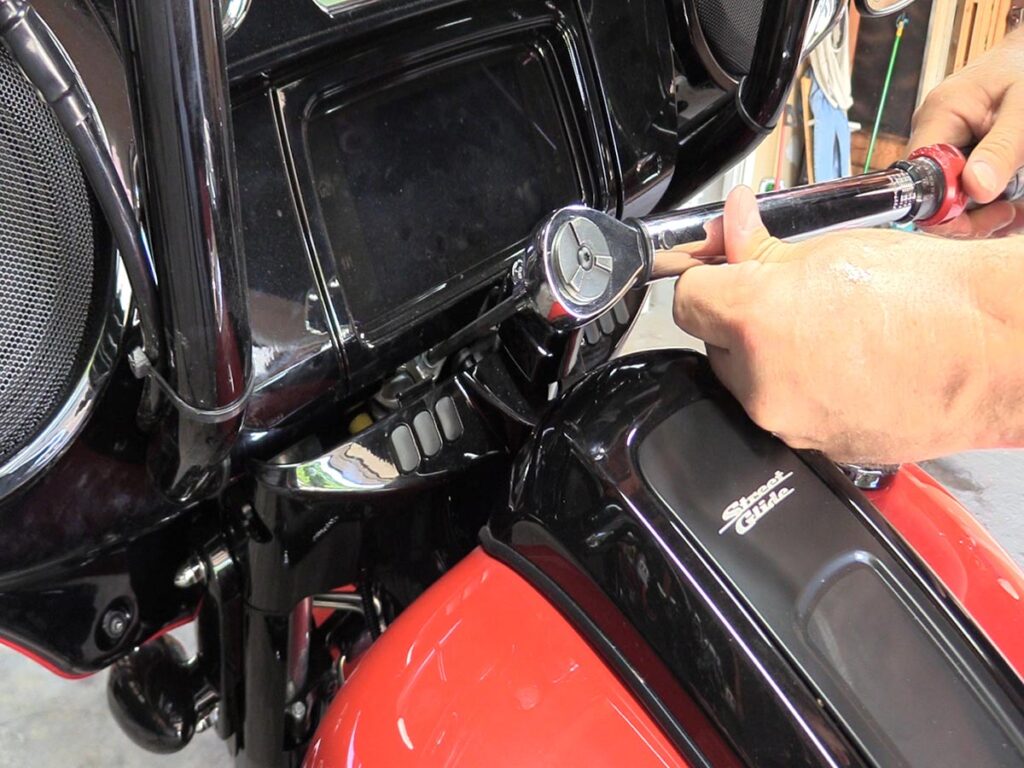
2013 And Above Models With Batwing Fairing
In 2013 Harley Davidson made a major improvement for adjusting the handlebars. They changed the Torx to an Allen head. This allows you to only remove the ignition cover and use an extended Allen with a Ball End. Loosen the two bolts closest to the tank, adjust the handlebar, and torque back to specifications.
Ease The Handlebars Into Place
Once you loosen the two handlebar clamp bolts you can move the handlebars. They will not move completely freely though. There will be some resistance since the top handlebar clamp bolts are still torqued to spec. When you push or pull the bars back to the position, do so slowly. The handlebars have ridges that dig into the softer metal of the handlebar clamp. This is done by design. It allows those ridges to grab the softer metal and help keep the handlebars from moving. If you start jerking on the handlebars you can smooth out the inside curve of the clamp. This could cause the ridges to not be able to indent into the clamp once it's tightened.
Put Everything Back Together
Using specifications from the service manual for your motorcycles year, make, and model, torque the handlebar clamp bolts. Reinstall the ignition cover and if applicable, the ignition switch.
Ride Strong Wrench Proud

Leave a Reply