
Can You Install Handlebars Yourself
This is a question everyone will have to answer for themselves. There is a lot involved in the process. There are a lot of tools you will need as well. You have to consider your aptitude for mechanical work. You might want to read this article before you begin. It will help with your decision. Motorcycle Maintenance Level Limitations
Parts Used For This Install
Paul Yaffe's Bagger Nation MBB125-12
Avon Grips
Control Wire Extensions
Fatbagger 4-Inch Clutch Line Extension
Mason Line
Wheel Bearing Grease
Articles Related To Handlebar Installation With Videos
Installing 12" Paul Yaffee Handlebars On A Harley Davidson (2012 Street Glide)
Installing 10" Paul Yaffee Handlebars On A Harley Davidson (2015 Street Glide Special)
Prepping And Wiring Motorcycle Handlebars
Adjusting Handlebars On Harley Davidson Touring Models
Reasons To Replace Motorcycle Mirrors
Mirror Plugs On A Harley Davidson Touring Motorcycle
Recruit Help
You might want to recruit some help with the handlebar install. Although you can do it solo, another set of hands sometimes helps. Extra help can help prevent damage to the motorcycle by holding parts while you work on them.
The Difficult Part
The most difficult part of a handlebar install is the wiring. It can be a challenge to get the wires through the handlebars. Some techniques can help with this. I included a video of how to prepare and wire handlebars at the end of this article. The year of the motorcycle can also make it more difficult. Any Harley 2014 and earlier has an enormous amount of wiring that has to go through the handlebars. In 2014 Harley moved to a CanBus System on their touring motorcycles, which greatly reduced the bulk of the wiring. This made it much easier.
The control wiring on 2013 and earlier models had a large Molex connector. You must unpin the connector to get the wires through the handlebar. Then you will have to rebuild the connector once they are through. Make a wiring diagram or take pictures of the pinout before disassembly. Later models have a smaller connector that can be pulled through the handlebar without disassembly. Below is a picture of a control wire extension kit for Harley touring models from 2007-2013.
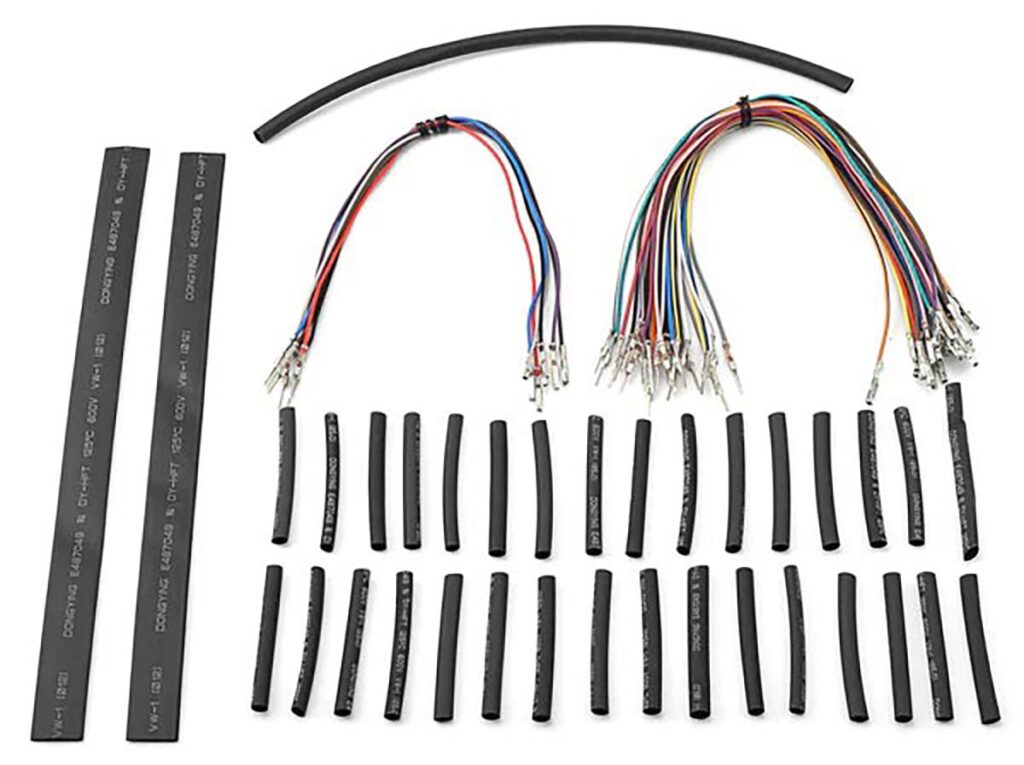
Handlebar Control Wiring Extensions
Any handlebar 12" and higher will require control wire extensions. You can put 10" handlebars on most models without extending the wiring. Again, 2013 and below will require a lot more work. The best way to extend the wires is to purchase a wire harness extension kit. Then cut the stock harness in half and solder each wire extension to increase the length. Stagger your cuts so you don't have a big bulge in the middle. That would make it near impossible to pull the wires through the handlebar. Use heat shrink tubing for every wire soldered.
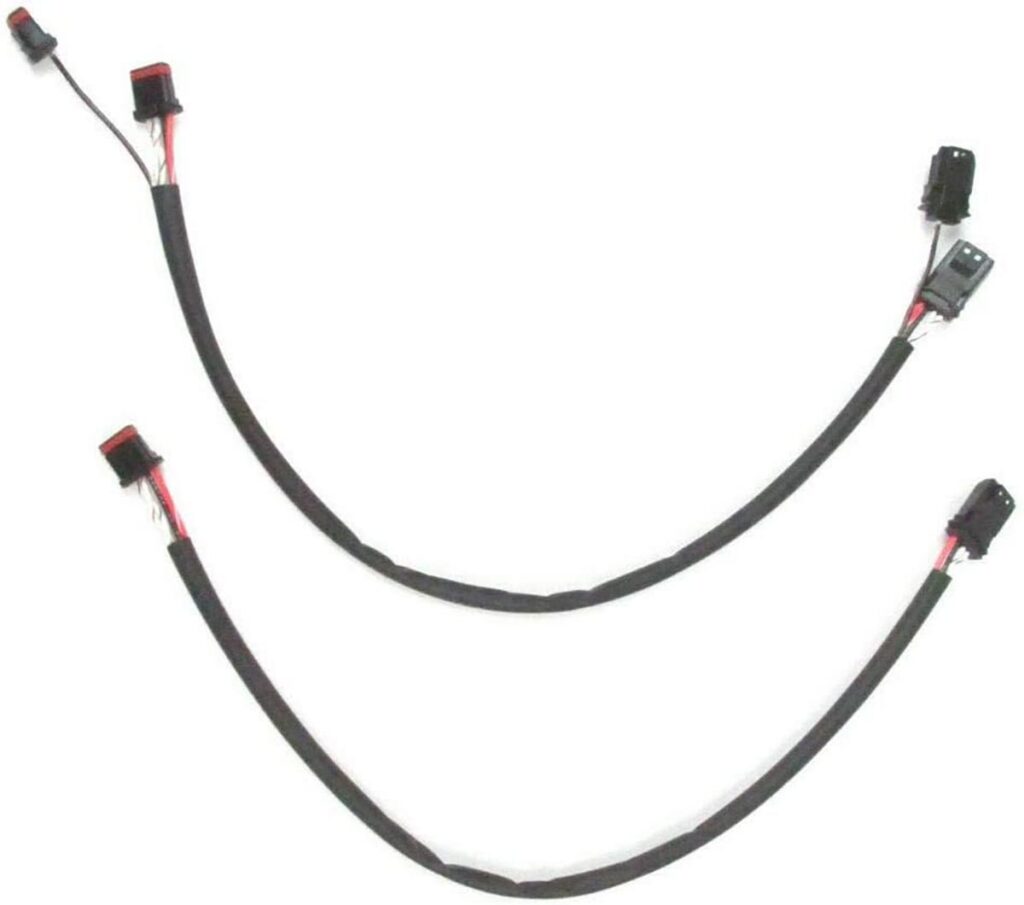
2014 and later models have far less wiring to deal with. For these years, you can purchase a plug-and-play wire harness extension. This makes it very easy to extend the control wiring. They work well for 12" bars or shorter. Anything over 12" will be difficult. The stock harness is not long enough to exit the bottom of the bars to install the extension. You will either have to cut the extension and solder it or plug it in and pull it through. Pulling the wires through after connecting the extension could damage the junction. It could pull the wiring out of the connector.
Twist Grip Sensor
The TGS can be problematic. If you pull on the wiring too hard, it can pull out of the TGS. You may not even know it happened until you put everything back together. You might finish and get a bunch of error codes or roll on the throttle and get no response. When the leading edge of the TGS gets to the tubing of the handlebar you need to be very careful. At that point, you will push it into the handlebar. You will then lightly pull the wiring as you push it in. This will prevent damage to the TGS. The year of the motorcycle can cause difficulties with this because of the amount of wiring between the control wires and the TGS.
2013 and below models have a huge amount of wiring on the TGS. Combine this with a large number of control wires, and it is extremely difficult. You may have to remove all harness jacketing to get the wiring through. 2014 to 2020 had a smaller plug on the TGS. Even though it was small, you still had to unpin the connector to get the wiring through. Then you must rebuild the connector once the wires are through the handlebars. The TGS on the 2021 and later models have a small connector that you can pull through the handlebars without disassembly.
TGS Wire Length
I have never had to extend the TGS wire length. They will usually be long enough for up to 16" handlebars. For 2014 and above years, you can purchase a plug-and-play extension if necessary. I would far rather use that instead of soldering if possible.
Riser Bushings
Many say you must replace the riser bushings with polyurethane for higher handlebars. I don't necessarily subscribe to that theory. I had 12" on my 2012 FLHX with stock bushings and had no issues. On my 2015, I used polyurethane riser bushings with 10" bars and ended up breaking the lower handlebar clamp one day while moving the bike around the garage. I think the poly bushing doesn't give when force is applied. When that happens, the weakest point will break. That was the lower handlebar clamp. Rubber bushings will give a bit to help deaden the force through the bars and handlebar clamp.

How you ride will also dictate if you need poly bushings or not. If you have to move the handlebars a lot, it might be a good idea to replace the stock bushings. The rubber ones might not hold up to a lot of handlebar action. Taller handlebars will also create a lot more stress on stock bushings. This will cause them to blow out faster. I saw many bikes while working at Harley with 14" and taller bars that blew out the stock riser bushings. I never saw an issue with 12" or lower bars with stock bushings. This is something you will have to ascertain for yourself.
Brake Line Extensions
Most Harley touring models have enough extra brake line length to install 12" and below handlebars. If you must extend them and have a motorcycle with ABS, some issues can occur. If air gets into that ABS module, you must take it to a dealership. They will bleed the ABS module using digital technician II software. If you are very careful, you can sometimes remove the upper brake line from the ABS module. Then install the new brake line and bleed from the front calipers up to the master cylinder. This will push air out through the master cylinder, so it doesn't get sucked into the ABS module.
Clutch Line Extension
On this install, I extended the clutch line with a 4" fatbagger extension. You can get away with the stock clutch cable up to 12" handlebars. It will be tight, though. I would rather have the cable lay naturally than stretch it to fit. If you put 14" handlebars or higher, you will need to extend the clutch cable.
Ride Strong Wrench Proud

Sir, I am not usually one to comment or send messages but I found your article and videos to be exceptionally thorough and well done and wanted to let you know that it is appreciated. Thank you! I just got my 2022 SGS and am doing my research to do new bars. My last handlebar job was my 2003 Electra Glide. Most things look about the same, but there have been some changes and I don't want to get in a tight spot. Question for you. I notice that you still have fairing mounted mirrors with your 12" bars; are you having any trouble seeing in them? I have read and seen other content that states that anything less than 14" and others say 16" you cannot see in those mirrors and must attach handlebar mount above or below. I am not a fan of that idea and would like to avoid that but prefer the way the 12" look and feel. I imagine height would have some play in this due to viewing angle but you look to be about my height or not too far off. I appreciate any feedback you can provide.
Hi there do you install bars as a side gig I’m looking to have my bars installed let me know if you do my name is David.